Before the sugar rush begins, I hope that you had a wonderful Thanksgiving, that it was filled family and pie and fun times. I know mine was. I have a couple of Thanksgiving recipes that I will have a post for soon, but cake comes first.
A lot of the time I enjoy my Thanksgivings because I have a whole week off from school and I get to do what I want, especially if we don’t travel. This past week I had a couple of days that I spent baking. On Tuesday one of my friends and I made cupcakes and on Wednesday a different friend helped me make a Lego cake.
Obviously I don’t do a lot of baking, I used boxed mix for half the cupcakes and the cake. But for the other half of the cupcakes we tried to do red velvet. I got distracted so I didn’t take any pictures in the process or at the end. I don’t know why or how they turned out so poorly, but they fell flat, weren’t red at all, and were more like a brownie than a cake of any sort. UGH! I was so frustrated. The cream cheese frosting turned out great, it was smooth and not too sweet, so that gave the cupcake failures a little more hope. I wish I could show you (actually I really don’t want to show you), but you know how it goes when you are excited about baking.
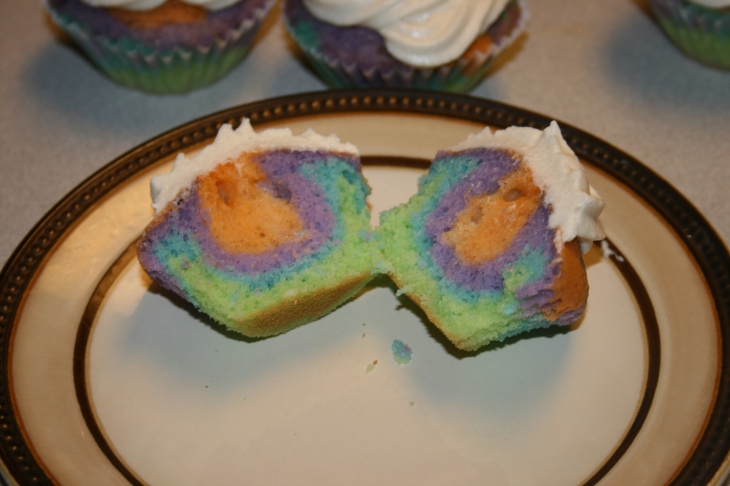
For the other cupcakes, we made them multi-color. 
It’s really simple, just a little messy. Again, because of the excitement I forgot to take pictures during the process. But what you do is you mix up the cake batter the way you normally would, but before you put it into the cupcake tines you divide it into a few bowls. Once the batter is relatively evenly divided color each portion with food coloring (I recommend the gel kind, but that’s my personal opinion) until it’s the shade you so desire.

Then, you layer the batter, going a single scoop at a time. You can be careful or not, but it will look neat no matter the way you do this part. The biggest thing is to make sure you don’t put too much batter in each tin, or it will overflow when it bakes.
The colored batter won’t mix, and so it gives it a really fun layered look. The flavor isn’t different at all, but it’s a nice surprise to bit into a cupcake and realize it’s not what you thought it was.
The very next day, because it’s not like I hadn’t had enough sugar the day prior, we made this.

Again, it was a boxed cake, but this time it was a lot harder to handle.
To make the Lego you fill four cupcake tins about two thirds of the way full, then evenly divide the rest of the batter between two square cake pans.
After its as cool as cake can get, you need to trim the tops of of the cupcakes and the puffy part of the cake (we didn’t do that, so it was a little lop-sided if you can’t tell). Then you can put the cakes together, tops inward, so that the smooth parts are on the outside. You can begin to frost now, just do a crumb coat to make sure that all the surfaces are smooth and all that jazz.
Once the crumb coat is finished, you can place the cupcake pegs on the top. You should do a little crumb coat on the pegs. Once the crumb coat has set up a little, you can do the decorating, in this case, that means you put as thick of a coat of frosting as you can because teenagers.
Be patient, it’s hard to decorate with frosting and a knife, fondant and piping is more popular for this reason, but it was actually a lot of fun. We did a little writing with a bag that had the tip cut off, but that was only four little “Lego”s.
Cake is fun, frosting is yummy, and friends are social. I am looking forward to doing some Christmas baking soon enough, but that might be a little while yet. Have fun with your own baking adventures.

